When To Take Squeaky Bike Brakes To A Shop — Safety Limits You Should Not Cross
As an Amazon Associate we earn from qualifying purchases. Some links on this page are affiliate links, which means we may earn a small commission if you make a purchase.
That high-pitched squeal when you squeeze the brakes after cleaning your bike is a warning, but lever travel, bite point, and pad/rotor thickness decide whether the bike is actually unsafe.
Most post-wash brake noise comes from contamination: chain lube, degreaser splash, or residue left when water doesn’t dry properly. These issues you can usually fix at home. The problem is that the internet serves you the easy fix on loop and barely mentions the situations where you should hand the job to a professional.
This article gives you a clear decision framework. By the end, you’ll know when to clean it yourself, when to replace the pads, and when to get to a shop.
Understanding the contamination problem
Contamination is the number one cause of brake squeal after cleaning. Even tiny amounts of oil on your rotor or brake pads will cause noise, and a wash is the most reliable way to introduce it. Chain lube flicks onto the rotor when you’re cleaning the drivetrain. Degreaser overspray lands on the pad surface. Rinse water carries contaminants you can’t see into the caliper. All three generate the same result: a sharp, persistent squeal that doesn’t fade on its own.
Skin oil is a culprit that gets missed often. Touch your rotor with bare hands after cleaning and you’ve just transferred exactly the kind of contamination that causes squeal. Muc-Off’s guide on disc brake squeal notes that contamination is the primary cause of post-cleaning noise, and the fix is removing that contamination, not adjusting the brakes.
Non-brake-specific cleaners are another source of the problem. General bike cleaners are designed to shift grime from the frame and components, but they can leave a film on braking surfaces that reduces friction rather than restoring it. If you’ve cleaned your bike and the brakes sound worse afterwards, the cleaner is the most likely culprit.
Wet brakes can also squeal temporarily. Water on the rotor creates a different friction coefficient than dry metal, and that change in feel can manifest as a high-pitched sound. The heat from braking usually burns off the water within a few hard stops. But if the noise persists after the brakes have dried and heated up, you’re dealing with contamination, and no amount of waiting will fix it.
Glazed pads develop when pads have been overheated—from sustained braking on a long descent, or from bedding in incorrectly—or when they’ve absorbed oil contamination. The surface becomes hard and shiny, and that smooth surface slips against the rotor rather than gripping it. Glazed pads squeal, feel weak, and don’t respond to cleaning alone.
The home fix process
Here’s the good news: most post-wash squeal clears up with two steps—a dedicated brake cleaner and a proper re-bedding process.
A brake-specific cleaner like Muc-Off Disc Brake Cleaner (paid link) is formulated to evaporate completely, leaving zero residue on the rotor or pads. That’s the key difference from general degreasers. If contamination is the cause, it’s the first thing worth trying. Where it falls short is heavy contamination: if the rotor has been exposed to significant chain oil, one spray may not be enough. Multiple applications and a clean rag to work the cleaner into the pad surface is a more thorough approach.
View Muc-Off Disc Brake Cleaner on Amazon → (paid link)
The re-bedding process rebuilds the pad-rotor contact surface. When you clean a rotor, you’ve removed the transfer layer that the pads have built up over hundreds of miles. Controlled braking rebuilds that layer with clean metal-to-metal contact.
The standard approach:
- Find a safe stretch of road or path with no pedestrians or traffic ahead.
- Build speed to a moderate pace on a road bike.
- Brake firmly—enough to feel the deceleration, not hard enough to lock the wheel.
- Repeat 10–15 times, letting the brakes cool slightly between each set.
A recent BikeRadar mechanic guide recommends this bedding-in process for disc brakes. Two or three hard stops after cleaning often resolves noise that otherwise seems stubborn.
Work up to the firm braking gradually—don’t grab the brake lever hard on the first attempt. Let the brakes cool between sets if you notice any smell or discolouration on the pads. If the squeal persists after 15 hard stops, the issue is probably deeper than surface contamination.
When to replace pads instead of cleaning
Sometimes contamination gets into the pad material itself, or the pad surface has glazed over beyond recovery. In those cases, cleaning and re-bedding won’t fix the noise.
Oily pads have a characteristic feel—they’ll look shiny or slightly discoloured, and they won’t respond to cleaner the way a lightly contaminated pad would. If you’ve applied brake cleaner, wiped the surface, and the squeal is still there, the pad material itself has likely absorbed the contaminant. New pads remove that surface and restore the friction performance that contamination has compromised.
The sanding debate comes up a lot in rider forums: is it worth sanding pads to restore their surface rather than replacing them? Sanding can reduce noise temporarily, but it doesn’t address the root cause if the rotor is still contaminated or if the pad material itself is compromised. Riders who sand pads and find the squeal returns after a few rides are usually dealing with a deeper contamination issue that replacement solves more reliably. If the pads are badly glazed—visibly shiny and hard—replacement is the cleaner option.
Look for a mirror-like shine across the pad surface, a colour change from black or grey to brownish, or any oily residue that doesn’t wipe off with brake cleaner. You can check your pads without removing them—shine a torch through the spokes at the pad surface visible between the rotor and the caliper. If the surface looks smooth and reflective, the pads likely need replacing.
When professional service is necessary
This is the part most articles gloss over, and it’s the bit that matters most for your safety.
There are situations where a bike shop isn’t a luxury—it’s the right call, and attempting the work yourself introduces real risk. The clearest of these is anything involving the hydraulic system on disc brakes.
A shop bleed for hydraulic disc brakes requires professional equipment and knowledge. Check with your local bike shop for their bleed costs. The DIY route requires specialised equipment that most home mechanics don’t have. For the first bleed, the shop is typically more reliable.
The reason hydraulic brake work is a shop job comes down to two things. First, opening the hydraulic system means risking air ingress—tiny bubbles trapped in the fluid line cause a spongy lever feel and reduced stopping power. Second, using the wrong fluid is catastrophic: mineral oil and DOT fluid are incompatible, and mixing them ruins seals and degrades braking performance. Multiple bike-maintenance sources confirm that brake manufacturers specify either mineral oil or DOT fluid and that the wrong fluid is damaging.
There’s also a torque consideration that gets overlooked. Bleed port bolts on brake calipers need to be tightened to the manufacturer’s specified torque—tight enough to seal the port, not so tight that you strip the thread. Overtightening a bleed port can damage the caliper body; undertightening lets fluid leak onto the rotor, creating exactly the contamination problem you’re trying to solve. Unless you have a torque wrench and know the spec for your specific brakes, this isn’t a guessing game you want to play.
The same applies to a sticking piston. If one or both brake pistons don’t return fully after you release the lever, the brake will drag, overheat, and wear unevenly. Piston issues—whether caused by contamination, damage, or old seals—are a professional repair, not a home adjustment.
Rotor rub that doesn’t resolve after centring the caliper also warrants a shop visit. If you’ve adjusted the caliper position and the rub persists, the wheel or dropout may be misaligned, or the rotor itself may be slightly bent. Riding with constant rotor rub wears the pad unevenly and reduces your braking power at the worst moment.
Safety Threshold: If you see brake fluid, cracks or chips in the rotor, pads that won’t retract, a lever that pulls to the bar without resistance, or persistent brake failure after normal adjustment—stop riding and book a shop. These are the signals that something is mechanically wrong, not just contaminated.
DIY vs shop decision guide
| Issue | DIY Fix | Shop Visit Required |
|---|---|---|
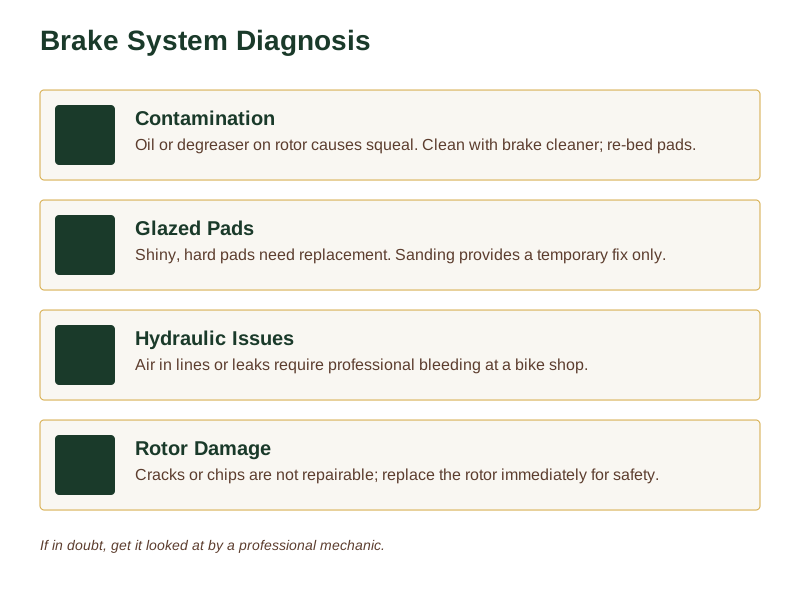
| Contamination (oil/degreaser) | Clean with brake cleaner, re-bed pads | If cleaning fails after multiple attempts |
| Glazed pads (shiny surface) | Sanding (temporary) | Replace pads if glazed beyond recovery |
| Hydraulic system issues | Not recommended for beginners | Bleeding, air ingress, fluid leaks |
| Rotor damage (cracks/chips) | Not repairable | Replace rotor immediately |
| Lever feels spongy or pulls to bar | Adjust cable/hydraulics | Bleed brakes or check for leaks |
| Piston sticking | Not recommended | Professional repair of seals/pistons |
Questions riders ask
Can I use WD-40 to clean my bike brakes?
No. WD-40 is a lubricant, and lubricant on your brake pads or rotor is exactly what causes the squeal in the first place. It’ll contaminate the pad surface and reduce friction rather than restore it. Use a dedicated brake cleaner—the kind formulated to evaporate completely with zero residue.
Why do my brakes squeal when it’s wet?
Water changes the friction coefficient between the pad and rotor, and that shift can produce a squeal. Usually it burns off within a few hard stops as the rotor heats up. If the noise persists after the brakes have dried and warmed, check for contamination—wet conditions can also fling chain lube onto the rotor.
Is it safe to sand my brake pads?
Lightly sanding with fine sandpaper can reduce surface glaze temporarily, but it won’t fix the root cause if the rotor is contaminated or the pad material is deeply compromised. Badly contaminated or glazed pads usually need replacing rather than sanding. If you sand, work evenly across the surface and clean the pad thoroughly before refitting.
Hydraulic leaks, cracked pad backing, or a rotor below minimum thickness are shop jobs—attempting these yourself risks making the problem worse. For detailed troubleshooting of specific brake noises, see our comprehensive brake-squeak guide .
If you want a simple way to keep track of what to check and when, grab our Free Bike Care Checklist —it covers brakes, drivetrain, tyres and storage in a straightforward format you can work through in under an hour.
Sources
- Muc-Off disc brake cleaning guide
- BikeRadar mechanic guide on disc brake bedding-in
As an Amazon Associate we earn from qualifying purchases. The products linked above are ones we think are worth a look.
Note: General guidance only. Always verify specific safety limits and repair procedures with a qualified professional or official manufacturer documentation.