How To Fix A Puncture On A Bike — Patch, Plug Or New Tube

As an Amazon Associate we earn from qualifying purchases. This page contains affiliate links — if you buy through them, we earn a small commission at no extra cost to you.
A puncture patch only bonds to a clean, dry, roughened surface. That’s why roadside cold and wet are the real enemies — not the size of the hole or the brand of your repair kit. When temperatures drop and moisture gets everywhere, most quick-fix solutions simply won’t hold.
The choice between patching, plugging, or replacing your inner tube comes down to one thing: will the repair survive your next ride in typical UK conditions? Here’s what actually works when the weather turns.
The short version is this: a traditional vulcanising patch is the most reliable long-term repair for a standard inner tube, a new tube is the fastest fix when you need to be somewhere, and a plug is for tubeless tyres only — it doesn’t belong anywhere near a standard tube.
Here’s the full breakdown.
Our Pick
- For reliability that lasts through winter Traditional vulcanising patch (tube glue + rubber patch) — the chemical bond holds up to cold, wet and tyre flex where self-adhesive patches simply don't.
- For speed when you're already running late Spare inner tube — swap it out at home or roadside, then patch the old one when time allows.
What You Need Before You Start
Don’t start dismantling anything until you’ve got your tools together. Have everything ready first; hunting for tools halfway through wastes time.
The essentials are straightforward:
- Tyre levers — a pair of solid ones. The Park Tool TL-1.2 (paid link) set is a reliable option for everyday use. Budget levers exist, but the cheap ones can snap on tighter tyres.
- A pump — track pump for home, a compact version for a saddlebag if you’re riding with a spare tube. The Lezyne Pocket Drive (paid link) is a compact emergency pump, though it’s slow to fully inflate a flat tyre — that’s the trade-off for its size.
Check Lezyne Pocket Drive price → (paid link)
- A puncture repair kit — either a traditional kit with vulcanising solution and rubber patches, or a spare inner tube. More on which matters below.
- Sandpaper or the abrasive strip from your kit — needed to roughen the tube before a vulcanising patch.
One thing riders often skip: check whether your wheels are quick-release or use a hex nut. If it’s the latter, you’ll need an appropriate spanner. It’s not a step you want to discover you’ve missed when the wheel is already off.
Now you know what you’re working with. Here’s the call that matters most.
The Verdict: Patch vs Plug vs New Tube
This is where the article earns its place, because there’s a popular assumption that needs correcting.
The assumption goes: patches are slow, self-adhesive patches are faster, so self-adhesive patches are the practical choice for most riders. That logic holds if you’re in July. It falls apart in a British winter.
Here’s why. Traditional puncture repair kits use vulcanising solution — essentially rubber cement — which chemically bonds to the rubber of your inner tube. The result is a molecular weld, not a stick. That bond resists the constant flexing of the tyre under load and the temperature swings of a cold, wet ride. It holds for months. Industry guidance confirms that vulcanising patches create a more permanent repair than self-adhesive alternatives.
Self-adhesive patches rely on pressure-sensitive adhesive that loses effectiveness as temperatures drop. When the tube flexes under load in cold conditions, this adhesive can delaminate. In a cold UK winter the roads are wet, the tyre is flexing, and the adhesive struggles to maintain its grip. Self-adhesive patches often fail quickly in winter conditions — that’s the mechanism doing exactly what physics says it will do.
The upshot: if you’ve got a puncture to fix before a week’s commuting, self-adhesive patches are a gamble. Vulcanising patches take five extra minutes and need the glue to go tacky before you apply the patch, but they work.
What about plugs? Puncture plugs are designed for tubeless tyre systems. A plug fills a hole in a tyre that has no inner tube — the system relies on tyre sealant to do the sealing work around the plug. Using a plug on a standard inner tube doesn’t work the same way and can damage the tube in ways that make a proper repair harder later. If your bike has inner tubes, plugs aren’t the answer.
What about just swapping the tube? A new inner tube gives you a complete, undamaged surface with no repair interface to fail. That’s the most reliable option if you’re on a ride and need to get home tonight. The trade-off is cost and waste — a new tube every time you get a puncture adds up, and it’s not great environmentally either. Patching your tubes is generally the more budget-conscious and sustainable approach over time.
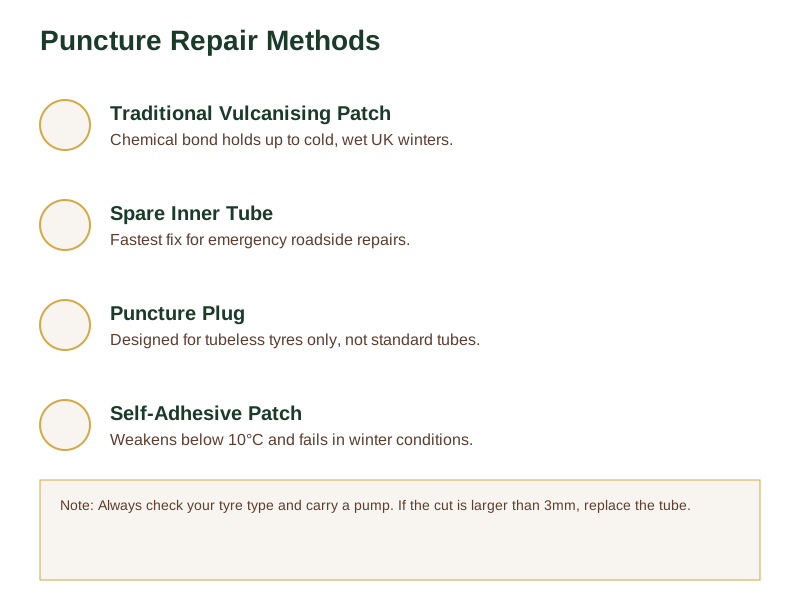
The practical call, then, is this: patch with vulcanising glue for reliability, swap the tube when speed matters or the damage is too large for a patch, and don’t reach for plugs unless you’re running tubeless. To summarise the key differences: a vulcanising patch offers high reliability in winter due to its chemical bond, though it takes moderate time (around five minutes). A self-adhesive patch is fast for summer fixes but has low reliability in the cold. A puncture plug is fast but only for tubeless tyres, not for tubes. A new tube is the fastest option and highly reliable as it has no repair interface to fail.
Step-by-Step: How to Fix a Puncture with a Traditional Patch
Right. Wheel off, tools ready. Here’s the sequence that works best.
1. Remove the wheel and tyre. Release the brakes if you’re dealing with rim brakes — most modern levers make this easy. For quick-release, open the lever. For nuts, use the right spanner.
2. Deflate the tyre fully. This makes tyre removal significantly easier and reduces the risk of pinching the tube when you lever the tyre off.
3. Push one tyre bead up and over the rim edge. Use a tyre lever to hook the bead and work it off. Don’t rush this — forcing it risks pinching the tube again.
4. Pull the inner tube out. Start near the valve and work your way around. As you pull it out, run your fingers along it carefully. You’ll usually feel the puncture or hear the hiss. For harder-to-find slow leaks, submerge the tube in water — bubbles will show you exactly where the air is escaping.
5. Check the tyre itself. Before you patch anything, run your fingers around the inside of the tyre. Find the sharp object — glass, thorn, wire, or a particularly aggressive piece of grit — and pull it out. If you patch the tube and the tyre still has something embedded, you’ll puncture it again.
6. Roughen the area around the puncture. Use the sandpaper or abrasive from your kit. The surface needs to be clean, dry and slightly rough — the vulcanising solution needs something to grip. Cycling UK’s repair guide emphasises the importance of proper surface preparation for a lasting repair.
7. Apply vulcanising solution. Coat the area around the puncture — slightly larger than the patch itself. Let it go tacky. Don’t rush this; the chemical bond won’t form properly if the solution is still wet.
8. Apply the rubber patch. Press it down firmly, working from the centre outwards to expel any air. Hold it down firmly until it sets.
9. Reinstall the tube and tyre. Make sure the tube sits inside the tyre evenly, not bunched or pinched. Reinflate just enough to seat the beads, then check the tyre is seated correctly all the way around before inflating to the correct pressure.
10. Check the repair holds. Reinflate to your tyre’s stated pressure — usually printed on the tyre sidewall — and let it sit for a few minutes. Check for any hiss.
Tyre pressure matters more than most riders realise. Under-inflated tyres are more likely to pinch-flat again, which creates the two small holes side by side that mark a pinch puncture. Check your pressure with a decent gauge — the Topeak D2x Digital Pressure Gauge (paid link) is easy to read, though it lacks a backlight for checking tyres in poor lighting.
When to Replace the Tube Instead
Patching is the right call for most situations, but there are times when swapping the tube makes more sense.
- The puncture is large. If the hole is ragged or wider than the patches in your kit, the repair won’t hold. Replace the tube.
- It’s near the valve. Patching close to the valve stem is awkward and the repair is less reliable in that location.
- The tube is old and brittle. Rubber degrades over time. A cracked, hardened tube isn’t worth the patch — fit a new one.
- You need to be somewhere now. On a ride, a spare tube gets you home. Patch the old one when you’re back, in the dry, with proper time to do it right.
Many commuters carry a spare tube specifically for this reason — a spare tube and a quick roadside swap is faster than patching in the rain. That doesn’t mean patching isn’t worth knowing; it means the spare tube is the right tool for that particular job.
Check Topeak D2x Digital Pressure Gauge price → (paid link)
View Park Tool TL-1.2 on Amazon → (paid link)
Frequently Asked Questions
Can I use a puncture plug on a standard inner tube?
No. Puncture plugs are designed for tubeless tyres, where tyre sealant handles the sealing. On a standard tube, a plug will damage the rubber and create a messy, unreliable seal. Use a patch or a new tube instead.
How long does a puncture repair last?
A properly applied vulcanising patch can last for the remaining life of the tube — the chemical bond doesn’t weaken the way adhesive patches do in cold weather. Self-adhesive patches are less reliable and shouldn’t be considered a long-term solution.
Do I need to remove the tyre to fix a puncture?
Yes. You need to remove the tyre from the rim to access the inner tube, locate the puncture, and inspect the inside of the tyre for the cause. Trying to patch the tube while it’s still seated against the rim is a bodge job that rarely holds.
What is a pinch puncture?
A pinch puncture happens when the tyre gets compressed hard enough for the rim to pinch the inner tube against it — typically from hitting a kerb or a pothole. It creates two small holes in the tube, side by side. The fix is the same as any other puncture, but pinch punctures are a sign that your tyre pressure may have been too low.
Making the Right Repair Choice
Use a vulcanising patch for reliability, a plug for tubeless tyres only, and a new tube when the tyre or valve is damaged. The repair must match the conditions you’ll be riding in — cold, wet roads demand a chemical bond, not just sticky adhesive.
For your full saddlebag setup and roadside repair techniques, see our complete puncture repair guide. Knowing which repair method to use when saves time, money, and frustration on your next ride.
If you’re looking to get your whole maintenance routine sorted — not just punctures — grab the free guide. It’s a checklist of the key checks and jobs that keep a UK commuter bike running reliably, season after season.
Get the Free Bike Care Checklist
Explore More Topics
Quick answers:
Go deeper on specific topics:
- How To Change A Bike Inner Tube Without Pinching It
- Why Does My Bike Tyre Keep Going Flat — Finding The Real Cause
- How To Tell If A Bike Tyre Is Worn Out And Needs Replacing
- How Much Air Should I Put In My Bike Tyres — Pressure Guide By Bike Type
- What To Carry For A Bike Puncture — Sensible Saddlebag Kit UK
Sources & Further Reading
As an Amazon Associate we earn from qualifying purchases. The products linked above are ones we think are worth a look.
Note: General guidance only, verify details with a qualified professional or official source.